|
Visitor Book Pro - Guestbook
- Log into your WebControl System (http://yourdomain.com/cgi-bin/Plusmail)
and click on "Free Scripts".
- From here, install the Guestbook script.
- Go to http://www.yourdomain.com/vbpro/docs/
- Take a minute to read this page, and then click on "continue
to next section". Click on master login, and log into
the WebControl System using admin as the user name, and
admin for password.

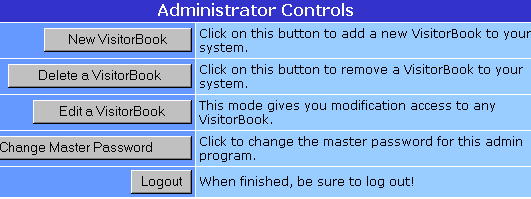
*** After logging in, change the master password for security.
- Click on New VisitorBook.
- Create a name and password for the Guestbook.
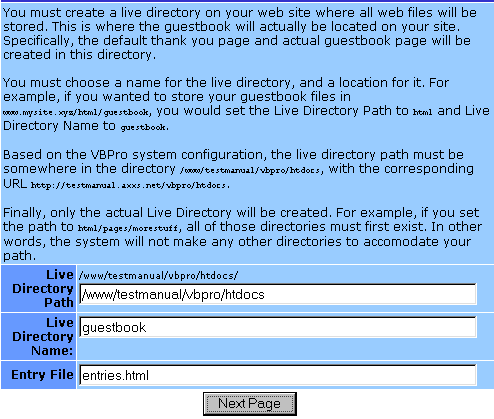
The next screen may look a little confusing, but it's not
that bad.

- It's probably best for now to leave the paths the way
they default: (/www/domain/vbpro/htdocs).
- The live directory name will be the name of your guestbook,
and Entry File is where your visitors will write to.
- At the next screen, it's best to start off with a predefined
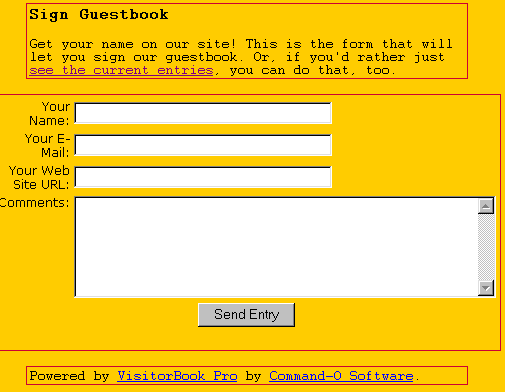
template. Standard or Groovy, it doesn't matter. (Groovy
is the nice yellow you see below).
- Click Enter, and log out to save the Guestbook you just
created.
- Next, go back to the main configuration page, and click
on the user login screen, and then click on "Edit VisitorBook".
These fields are pretty self explanatory, and in the beginning,
you might choose to leave the HTML alone. One field you can
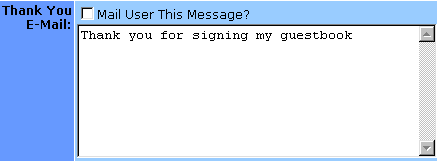
edit is the email template. This is the email that will be
sent to your users after they submit the message.

- Open your browser and take a look: http://www.yourdomain.com/vbpro/htdocs/Guestbook/.
- If all goes well, you should see your creation in your
browser. Test it out to make sure it works.
If you ever need to make changes, or add any new guestbooks,
you can log back into the user or admin screen.

This is what the final Guestbook looks like! After this,
you will see a Thank You screen in which you can view the
Guestbook entries.
-
Previous Topic:
Autoresponders
Back
to Main Menu
Next Topic:
WebControl
Pass
|

